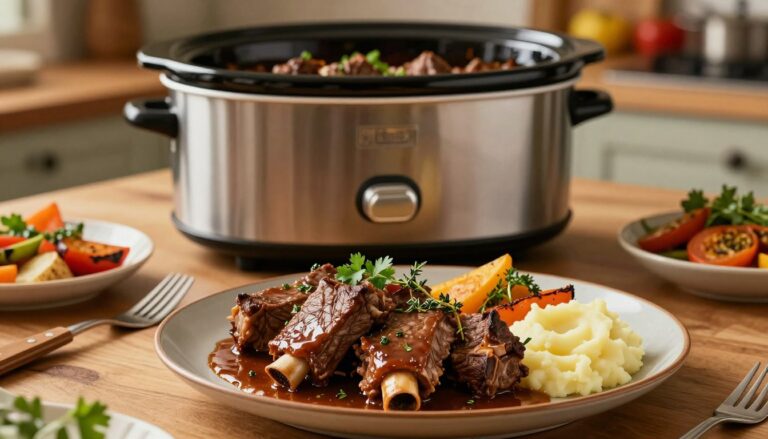

Corned Beef Hash with Canned Corned Beef: Easy Recipe
Turning a can of corned beef into a meal is incredibly satisfying. It feels like you’ve spent hours cooking, but it only takes minutes. This is the magic of making corned beef hash with canned corned beef. It’s a mix of convenience and comfort.
You don’t need fancy stuff or to be a pro in the kitchen to make this hash. A recipe for corned beef hash with canned corned beef uses simple ingredients like potatoes, onions, butter, and seasonings. These common items, along with the canned corned beef, create a dish as good as your favorite diner’s.
Your homemade corned beef hash is perfect for any day of the week. It’s a quick dinner or a special breakfast. This recipe turns cheap ingredients into something fancy. You’ll learn how to pick the right potatoes, get that crispy texture, and add your own twist to the dish.
This article will teach you everything about making this classic comfort food. You’ll find out how to prepare, cook, and get expert tips for perfect results every time.
Key Takeaways
- A canned corned beef hash recipe takes under 30 minutes from start to finish
- You can create an easy corned beef hash with just five basic ingredients
- Russet potatoes work best for achieving that crispy golden texture
- Pre-cooking your potatoes ensures even cooking throughout your hash
- Restaurant-quality results come from not stirring your hash too much
- Your homemade corned beef hash stores well in the refrigerator for up to four days
- This dish pairs perfectly with fried eggs and fresh vegetables for a complete meal
What is Corned Beef Hash and Why You’ll Love It
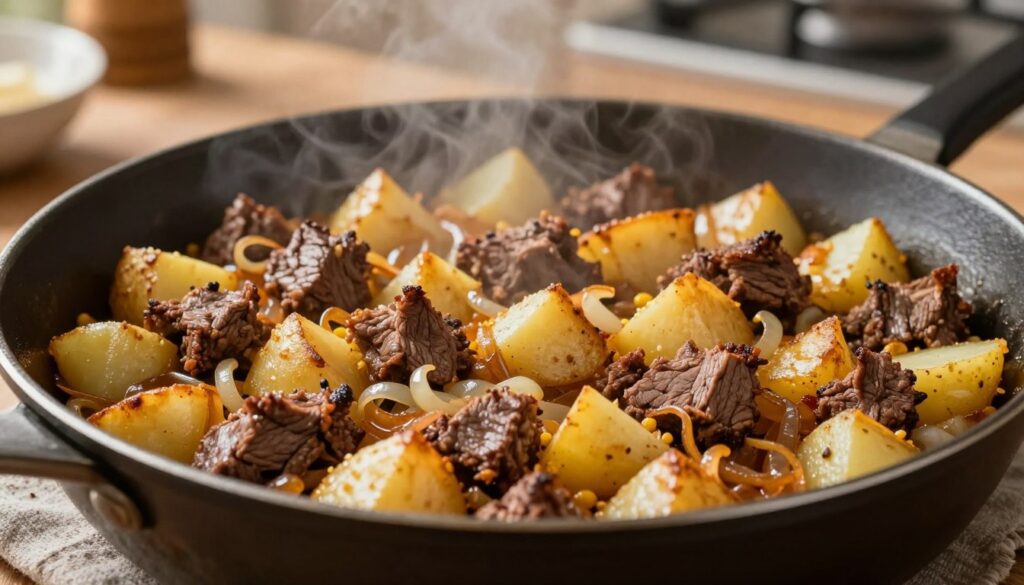
Understanding corned beef hash starts with two simple ideas. Hash means chopped ingredients cooked together in a skillet. Corned beef is beef brisket cured with rock salt. Together, they make a classic comfort food loved at breakfasts in America.
The beauty of corned beef hash breakfast is its simplicity. It takes quality ingredients and turns them into something amazing. The dish has rich flavor and a satisfying texture that makes people want more.
The History Behind This Beloved Dish
This classic comfort food has an interesting history. Ashkenazi Jews from Northern Europe brought corned beef to the United States. Irish immigrants later made it popular, especially on St. Patrick’s Day.
The curing process gives corned beef its unique pink color and flavor. This history shows why the dish is still loved today.
Why Canned Corned Beef Makes This Recipe So Easy
Canned corned beef makes this dish perfect for busy days. It’s already cooked, seasoned, and lasts a long time. This means you can make a tasty meal quickly, without spending hours cooking.
- Pre-cooked and ready to use
- Consistent flavor and quality every time
- Long shelf life for convenient storage
- Affordable compared to fresh cuts
- No special preparation required
Both professional chefs and home cooks use canned corned beef for its reliability. It’s convenient without losing flavor, making it a quick and delicious option any day.
Essential Ingredients for Canned Corned Beef Hash
To start making corned beef hash, you need the right stuff. A 12-ounce can of corned beef is your base. It’s enough for 4-5 people and is easy to use because it’s canned.
- One 12-ounce can of corned beef
- 2-4 cups of diced potatoes (peeled russet or baby potatoes work best)
- 1 medium onion, diced
- 1-4 tablespoons of oil or butter for cooking
- Salt and black pepper to taste
For extra flavor, think about adding some extras. A tablespoon of apple cider vinegar adds a nice tang. Minced garlic (3-4 cloves) brings a deep aroma. A teaspoon of paprika adds a smoky taste. And don’t forget a sprinkle of fresh parsley for a pop of color.
Seasoning is important. Canned corned beef is already salty, so use salt sparingly. Start with a little and taste as you go. This way, you can avoid a too-salty dish and control the flavor.
Make sure you have everything ready before you start cooking. Chop your potatoes and onions ahead of time. And have your oil or butter ready to go on the stovetop.
Recipe for Corned Beef Hash with Canned Corned Beef
Making corned beef hash is simpler than you think, especially with canned corned beef. It’s ready in under 35 minutes, great for breakfast or brunch. Follow the steps carefully to make a tasty meal, whether you’re new or experienced.
Preparation Steps
First, prepare your ingredients. Cut potatoes into ½-inch cubes for even cooking. Dice onions into similar sizes for even cooking time. Open the canned corned beef and let it sit for a minute. Then, break it apart with a fork into small pieces.
You can boil potatoes for 5 to 10 minutes until tender, then drain them. This method is quicker. Or, start with raw potatoes for a firmer texture in your dish.
Cooking Instructions
Here’s how to cook corned beef hash perfectly:
- Heat 2 to 4 tablespoons of oil or butter in a large skillet over medium-high heat
- Add your prepared potatoes and onions to the hot pan
- Cook for 5 to 10 minutes, stirring occasionally, until the edges start browning
- Break up your canned corned beef and add it to the pan
- Season with pepper, garlic powder, onion powder, and paprika to taste
- If using vinegar, add a splash and let it cook off for 2 to 3 minutes
- Reduce heat to medium, cover the pan, and cook for 15 minutes until potatoes are soft
- Remove the cover and press the mixture down with a spatula
- Cook uncovered for 3 to 5 minutes until a golden crust forms on the bottom
- Flip sections of the hash and repeat 2 to 3 times for crispy texture throughout
Your total cooking time is about 25 to 30 minutes, plus 5 minutes of prep. This method makes the potatoes tender and the edges crispy, creating a delicious dish.
How to Get Perfectly Crispy Corned Beef Hash
Making crispy corned beef hash needs patience and the right method. The key is to manage moisture and heat well. Many home cooks rush, ending up with soggy hash instead of the golden crust they want.
Learning to make hash crispy starts with controlling moisture. Once your potatoes are tender, remove the skillet cover. This lets steam out and dries the ingredients’ surface. Without this, moisture traps and prevents browning.
Temperature is crucial for perfect crispy hash. Use medium-high heat for the best results. Low heat makes steam, not crisp edges. High heat burns the outside before the inside cooks. The right temperature gives a golden brown finish.
Follow these steps for perfectly crispy corned beef hash:
- Press the hash mixture firmly with the back of your spatula into an even layer
- Leave it undisturbed for 3-5 minutes to develop a crust
- Scrape the bottom and flip portions upward
- Repeat the press-and-wait method 2-3 times
- Use a large cast-iron skillet for consistent heat distribution
Never overcrowd your pan. Too much food steams instead of crisps. A cast-iron skillet is best because it keeps heat even and browns well. Divide your butter to keep the pan moist during cooking.
This technique adds layers of flavor and texture. Each press-and-flip cycle makes more crispy bits. Patience turns ordinary corned beef hash into something special.
Best Types of Potatoes to Use in Your Hash
Choosing the right potato is key for a great corned beef hash. The best potatoes for hash depend on the texture you prefer. Each type of potato brings its own qualities to your dish, affecting taste and texture.
Russet vs Yukon Gold Potatoes
Russet and Yukon Gold potatoes offer different experiences. Russet potatoes are high in starch and low in moisture. They become fluffy and have a crunchy, golden exterior that many love.
Yukon Gold potatoes have a naturally buttery flavor and creamy texture. They stay firm, giving you distinct potato pieces. Yukon Gold potatoes are perfect for a richer taste and smoother texture.
Other options like baby, red, and fingerling potatoes add visual appeal and a waxy texture. Each type brings something special to your dish:
- Baby potatoes: Small, tender pieces that cook quickly
- Red potatoes: Waxy texture that holds shape well
- Fingerling potatoes: Long, thin pieces with nutty flavor
Should You Pre-Cook Your Potatoes
There are two ways to prepare your potatoes. Pre-cooking by boiling for 5-10 minutes until fork-tender shortens cooking time. This ensures even tenderness and a crispy outside.
Starting with raw potatoes offers different benefits. You have more control over texture and a firmer bite. Raw potatoes take longer to cook, so watch your pan closely to avoid burning.
Cut your potatoes into ½-inch pieces for even cooking. This size is perfect for a golden crust and tender inside, whether pre-cooked or raw.
Delicious Variations and Add-Ins for Your Corned Beef Hash
Corned beef hash is incredibly versatile. You can make it your own by trying out different variations. This lets you match your taste and what you have at home.
Adding vegetables can make your hash more colorful and tasty. Here are some great add-ins:
- Diced bell peppers (red, green, or yellow) for sweetness and brightness
- Fresh or canned tomatoes that add acidity and moisture
- Sautéed mushrooms for an earthy, rich flavor
- Cabbage for an authentic Irish twist
- Onions for depth and caramelized sweetness
Want to make your hash even better? Try adding Worcestershire sauce for a deep flavor. Hot sauce adds a bit of heat. For more spice, use cayenne or crushed red pepper flakes.
Adding eggs is a fun way to customize your hash. Make wells in the hash, crack in eggs, and bake until they’re set. This makes a complete meal that’s both filling and impressive.
Don’t just stick to corned beef. Try using leftover pot roast, brisket, or ground beef. These changes give you new versions of the classic dish, all while keeping the cooking method the same.
What to Serve with Corned Beef Hash
Creating the perfect corned beef hash breakfast is more than just the hash. The right sides and accompaniments make your meal special. Whether it’s for a weekend brunch or a quick weeknight dinner, knowing what to serve with corned beef hash is key. It helps you create a satisfying plate that your family will love.
Traditional Breakfast Pairings
Eggs are the perfect partner for corned beef hash. A fried egg with a runny yolk is the classic choice. When you break that yolk over your crispy hash, it makes a rich sauce that coats every bite. Scrambled eggs are a lighter option if you prefer something less heavy.
For a fancier presentation, poached eggs turn your hash into an elegant Eggs Benedict when paired with hollandaise sauce and English muffins.
Serving suggestions for hash should always include bread options. Here are some corned beef hash sides:
- Buttered toast for soaking up flavors
- Toasted English muffins
- Bagels with cream cheese
- Whole wheat bread for extra nutrition
Irish-Style Accompaniments
To honor the dish’s heritage, build an authentic spread. These corned beef hash sides create a complete Irish breakfast:
- Pork or blood sausages
- Crispy bacon strips
- Sautéed mushrooms
- Sautéed cabbage or cabbage gratin
- Baked beans in tomato sauce
- Irish brown soda bread
Add hot sauce for heat or sour cream for cooling richness. Your corned beef hash is perfect for breakfast, brunch, or dinner.
Using Leftover Corned Beef vs Canned Corned Beef
When making corned beef hash, you have a big decision. Should you use leftover corned beef or grab a can from the store? Both choices are great for this classic dish. Knowing the differences between canned and leftover corned beef helps you decide.
If you’ve cooked corned beef recently, using leftovers is a good idea. You’ll get a meatier texture with distinct chunks. Fresh corned beef also lets you control the seasoning since you made it.
Canned corned beef is super convenient. It’s always available at stores and is very affordable. Plus, it’s shelf-stable, so you can use it anytime.
Understanding texture and salt differences is key when cooking:
- Leftover corned beef gives you chunkier pieces
- Canned corned beef is finer and breaks apart easily
- Leftover corned beef lets you control salt levels
- Canned versions are saltier due to preservation
You’ll need about 2 cans (12 oz each) or 4 cups of chopped cooked leftover corned beef for most recipes. Since canned corned beef is salty, taste your hash before adding more salt. Some people rinse canned corned beef under cold water to cut down on sodium, but it also loses some flavor.
Both leftover and canned corned beef hash are tasty. Your choice depends on what you have and your taste preferences.
Tips for Making the Best Canned Corned Beef Hash
Learning the right corned beef hash tips can change your cooking. You can make your dish go from simple to amazing with a few tricks. Whether you’re worried about salt or want your hash to taste like it’s from a restaurant, these tips will help.
How to Reduce Sodium Content
Canned corned beef is very salty, which can make your dish too salty. But, you can make your hash less salty without losing flavor. Start by rinsing the canned corned beef under cold water for about 30 seconds. This removes some salt while keeping the meat tender and flavorful.
Choosing the right ingredients is key to reducing sodium. Use unsalted butter instead of salted butter for cooking. This lets you control how salty your dish is. You can always add salt later, but you can’t take it out once it’s mixed in.
Try these smart approaches:
- Increase your vegetable ratio to dilute saltiness naturally
- Skip adding extra salt during cooking
- Add a splash of vinegar or lemon juice to brighten flavors
- Taste your hash as you cook
Achieving Restaurant-Quality Results at Home
Professional cooks use special methods to make restaurant-quality hash. They use cast-iron skillets for even heat and better browning. Don’t overcrowd your pan, as this prevents proper crust development.
The secret to the best corned beef hash recipe is patience. Let your hash sit undisturbed to form a golden crust. This is what separates amateur cooking from professional results. Use the press-and-flip method multiple times throughout cooking.
Build layers of flavor with these techniques:
- Add butter in stages rather than all at once
- Season with garlic powder and onion powder
- Use smoked paprika for depth
- Finish with fresh chopped parsley
These corned beef hash tips will bring restaurant-quality results to your breakfast table without leaving home.
Storing and Reheating Your Corned Beef Hash
Your homemade corned beef hash can be enjoyed more than once. Proper storage techniques make meal prep worth it. Whether you cook a big batch or have leftovers, knowing how to store them keeps your food safe and tasty.
Before storing, let the hash cool to room temperature. Don’t leave it out for more than two hours to avoid bacteria growth. Once cooled, put it in an airtight container and refrigerate.
Storing corned beef hash in the fridge keeps it fresh for up to three days. This makes meal prep easy. Cook on Sunday and enjoy throughout the week for quick breakfasts.
Freezing corned beef hash is also a great option. It stays good for up to three months in the freezer. Divide it into individual portions before freezing. This way, you can thaw only what you need without wasting food.
Reheating corned beef hash brings back its satisfying texture. You have two main options:
- Skillet method (preferred): Heat a small amount of oil or butter in a skillet over medium heat. Add your hash and let it sit undisturbed for a few minutes. This creates a crispy crust that tastes fresh.
- Microwave method (fast): Warm your hash until heated through. This works quickly but won’t restore crispiness.
If your hash seems dry during reheating, add one tablespoon of water and cover the pan briefly. Steam will heat the center while the bottom crisps up. Even frozen hash reheats easily—just allow a bit more time and use medium or medium-low heat to prevent burning.
Common Mistakes to Avoid When Making Corned Beef Hash
Making corned beef hash at home is easier than you might think. Yet, many home cooks face the same issues. Knowing what not to do can help you avoid disappointment and get great results.
Understanding common mistakes is key. It’s all about avoiding soggy, gray hash and achieving that perfect golden crisp.
Overcrowding the Pan
One big mistake is putting too much in your skillet. Overcrowding means your ingredients release moisture that can’t evaporate. This leads to steam instead of the dry heat needed for browning.
This results in gray, mushy hash instead of the crispy dish you want. Use a large 12-inch skillet for a standard recipe. For bigger batches, cook in separate batches to keep quality high.
- Spread ingredients in a single, even layer
- Keep the layer about 1 to 1.5 inches thick
- Leave some pan surface visible between pieces
- Avoid stacking or piling ingredients
Not Letting the Hash Develop a Crust
Creating a crispy hash takes patience. Many cooks stir constantly, fearing burning. But this stops the Maillard reaction, which gives you those delicious brown, crispy bits.
Press your hash down firmly into the pan, then step away for 3 to 5 minutes without stirring. Listen for the sizzle and smell for that toasty aroma. These signals tell you browning is happening.
- Resist the urge to stir constantly
- Let the mixture sit undisturbed for 3-5 minutes
- Press down to maximize pan contact
- Trust the process and avoid peeking too often
Beyond these main mistakes, watch out for other common errors:
- Adding salt without tasting first (canned corned beef is already very salty)
- Using heat that’s too high (burns the outside while interior stays undercooked)
- Failing to press the mixture firmly into the pan (reduces browning contact)
- Adding eggs too early (they overcook while hash is still cooking)
Master these techniques, and you’ll serve perfectly crispy corned beef hash every time.
Conclusion
You now have all the tools to make an easy corned beef hash at home. This simple recipe uses affordable ingredients and takes under 30 minutes. It’s budget-friendly thanks to canned corned beef from your pantry.
Your family will love the mix of crispy potatoes, savory corned beef, and onions. It’s a hearty meal that won’t empty your wallet.
The quick corned beef hash technique ensures success every time. Choose the right potatoes for your taste. Use the press-and-flip method for a crispy crust.
Be careful with seasoning since canned corned beef has salt. These steps will help you make a dish that tastes like it came from a restaurant.
Your homemade hash recipe can evolve based on your preferences. Add cabbage and soda bread for an Irish twist. Bake eggs into the hash for a one-pan meal.
Serve it at breakfast with toast and eggs, or for dinner with a fresh salad. It’s perfect for lazy Sunday brunches, St. Patrick’s Day, or weeknight dinners.
You’re all set to make this classic comfort food your own. Adapt it to fit your family’s tastes. An easy corned beef hash brings warmth and satisfaction to your table. Start cooking today and see why it’s a favorite in American kitchens.
Explore more delicious meals in our beef category.